Table of Contents
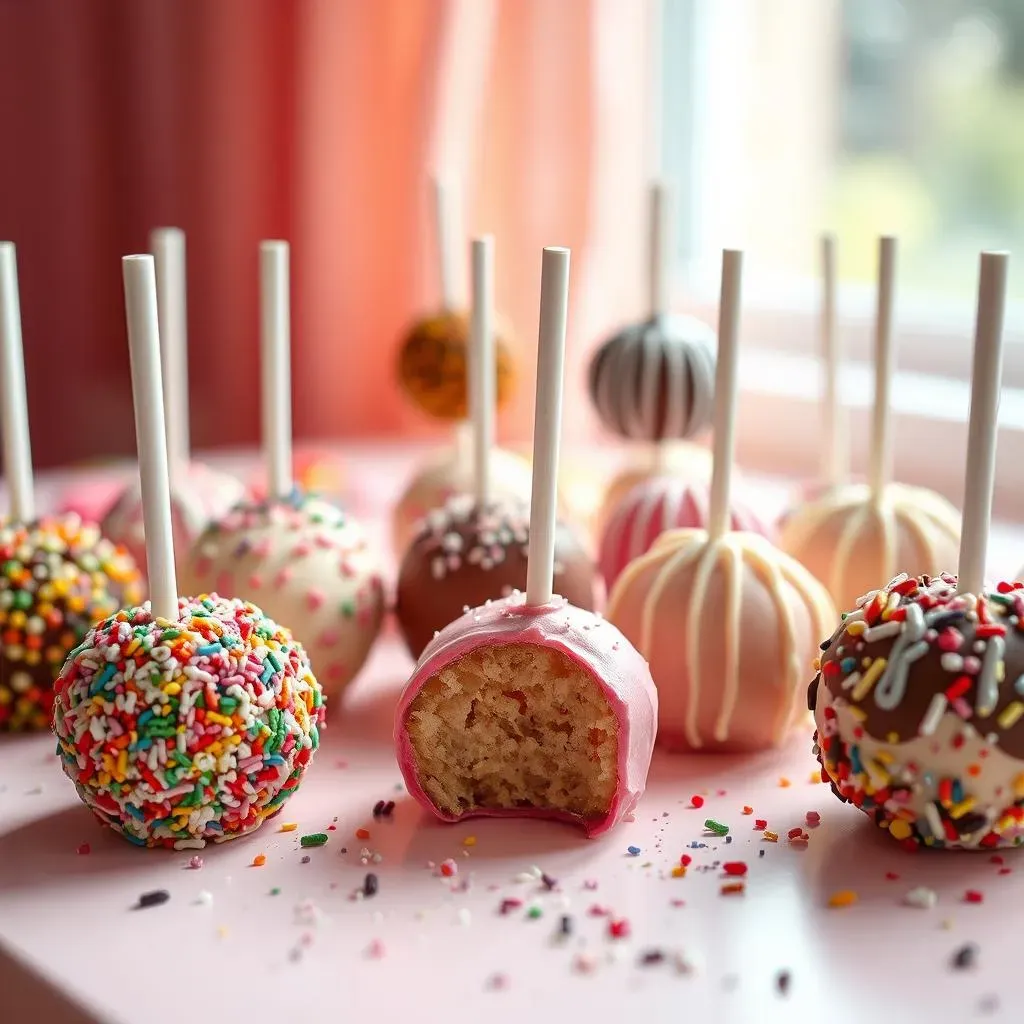
Are you planning a gender reveal party and searching for a treat that's both adorable and delicious? Forget the usual cakes and balloons; let's talk cake pops! These bite-sized wonders are the perfect way to announce your little one's gender. I remember when my sister had her gender reveal, she was so stressed about the outcome, but when she saw the cake pops she was thrilled. In this article, we're diving into the world of "cake pops ideas for gender reveal," giving you a simple, foolproof recipe that’s as fun to make as it is to eat. We'll cover everything from the basic ingredients to clever variations and storage tips. Get ready to wow your guests with these delightful treats, and discover all the secrets to make them perfect every time. We will cover why you will love this recipe, what ingredients you need, and step-by-step instructions. We will also touch on how to store them, what to serve them with, and answer common questions. Let's get baking and make your gender reveal unforgettable!
Why You Will Love this Recipe
Why You Will Love this Recipe
Easy Peasy, Lemon Squeezy
Let's be real, some recipes can be a total headache. This one? It's the opposite of that. You don't need to be a master baker or have a kitchen full of fancy gadgets. I'm talking simple ingredients, straightforward steps, and minimal mess. Even if you're like me and sometimes burn water, you can nail these cake pops. Trust me, the ease of this recipe is a huge win, especially when you're juggling a million other things for the gender reveal party.
Totally Customizable
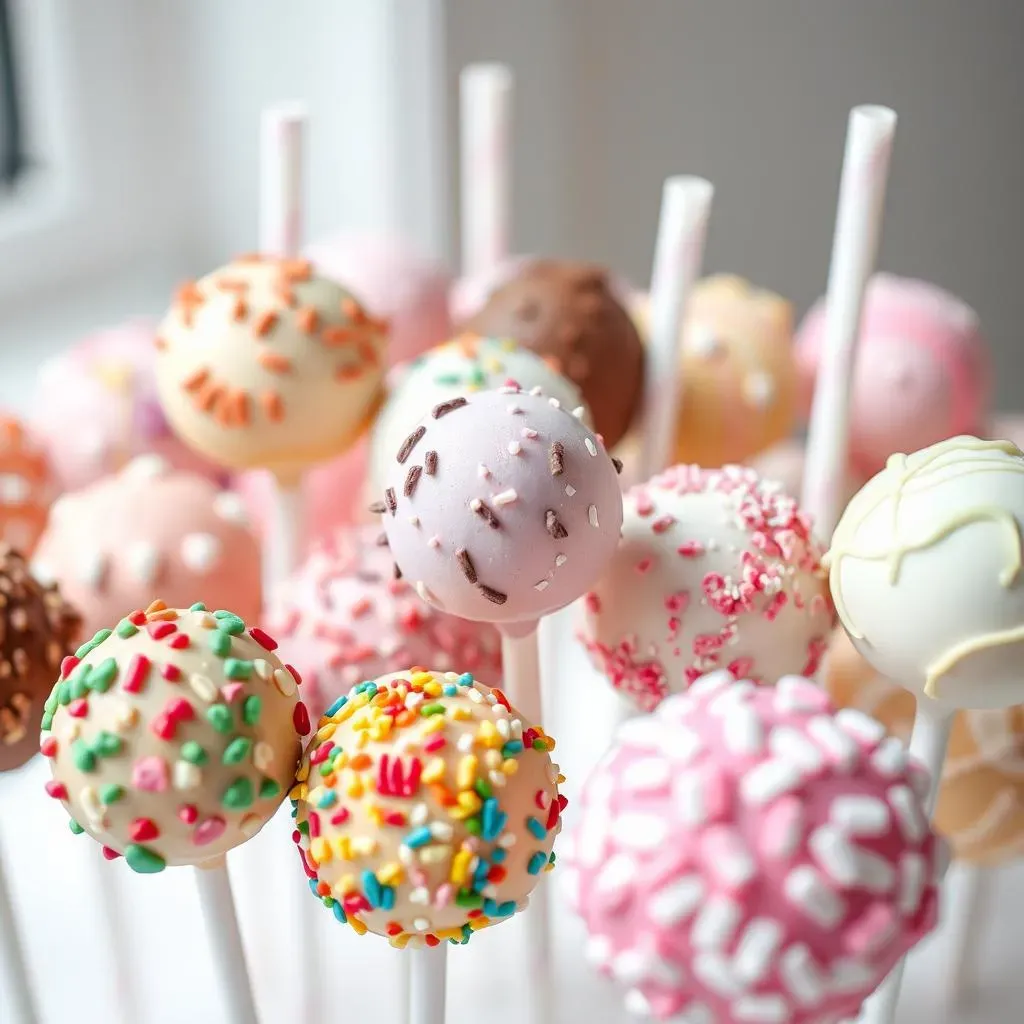
One of the best things about these cake pops is how flexible they are. Want to use a different cake flavor? Go for it! Prefer dark chocolate instead of white almond bark? No problem. You can play around with the colors, add different sprinkles, or even drizzle them with extra chocolate. It's like a blank canvas for your creativity. I once made a batch with a hint of lemon extract and they were a total hit. The possibilities are endless, so you can truly make them your own.
Customization | Options |
|---|---|
Cake Flavor | Vanilla, Chocolate, Lemon, Strawberry |
Coating | White Almond Bark, Dark Chocolate, Candy Melts |
Decorations | Sprinkles, Drizzles, Edible Glitter |
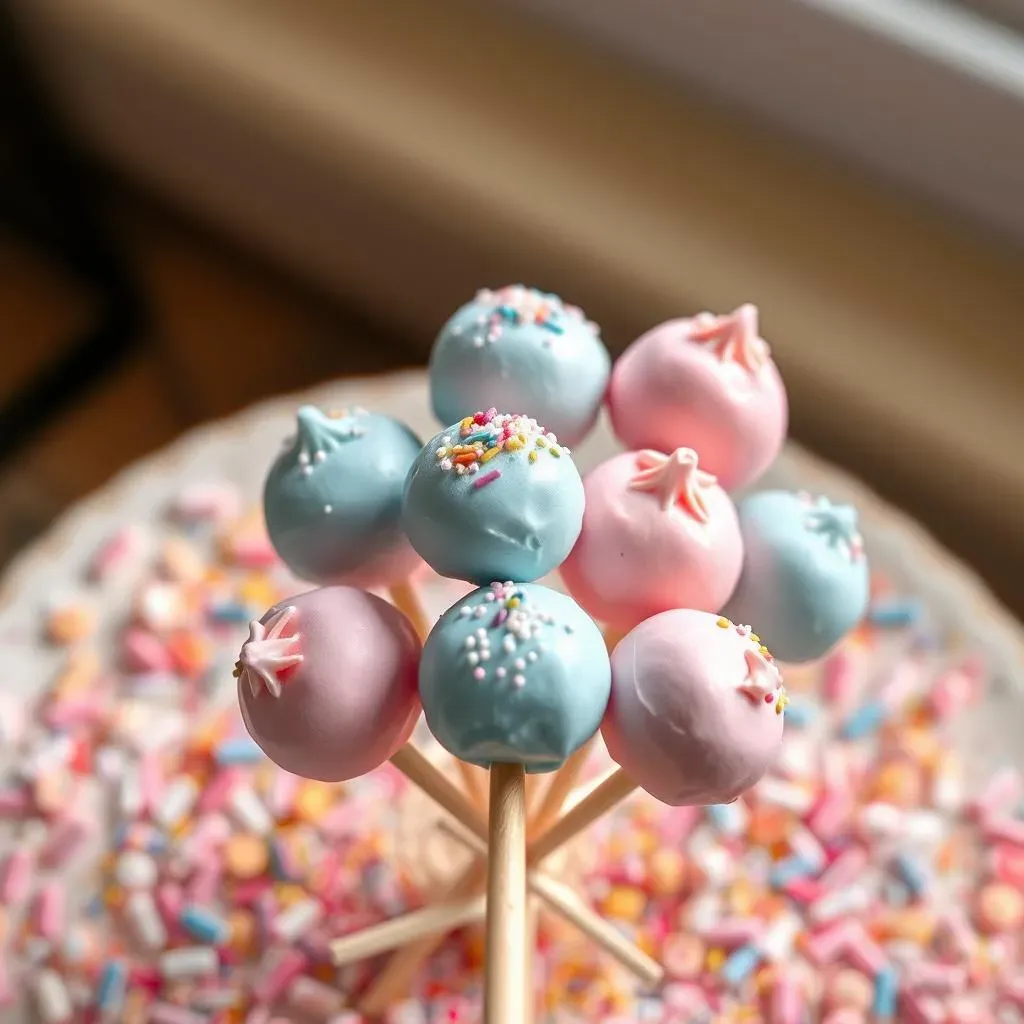
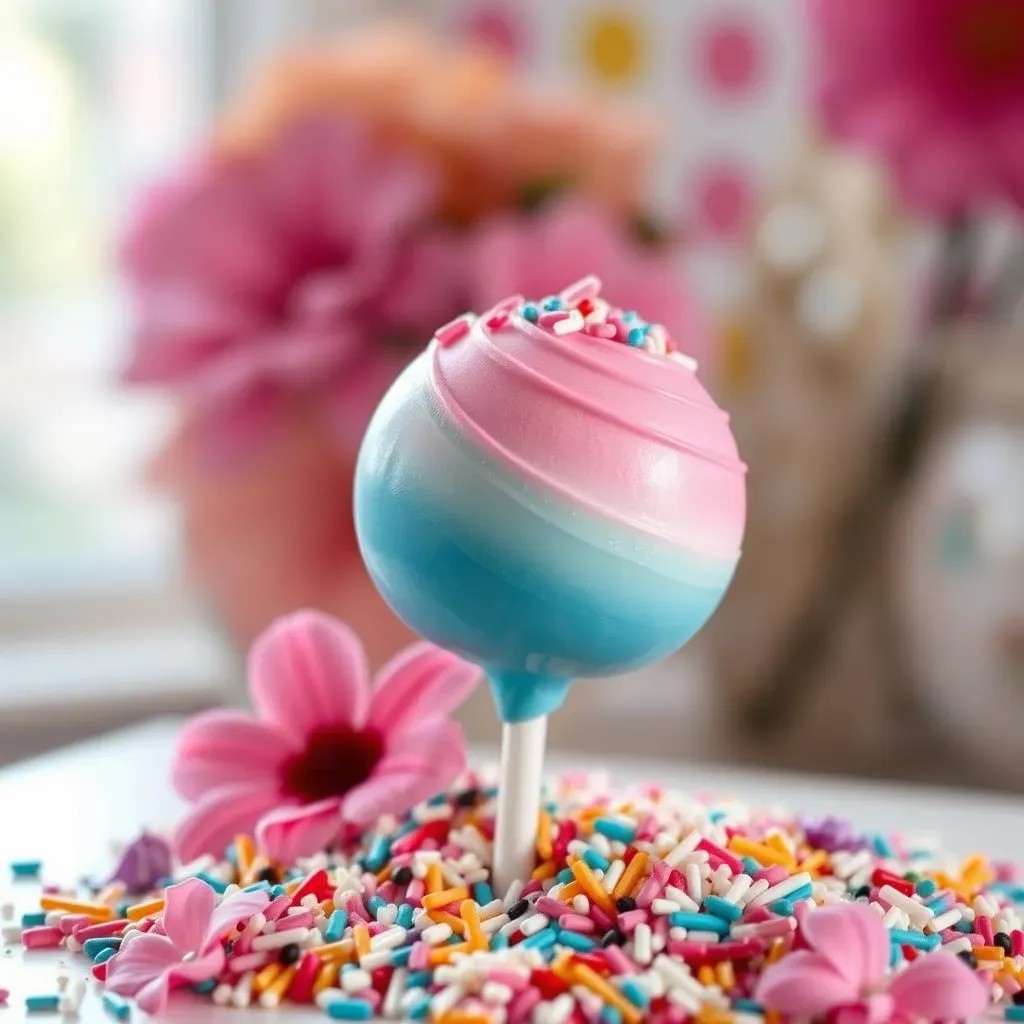
The Big Reveal Made Delicious
Let's face it, the gender reveal is all about the big moment. These cake pops add an extra layer of fun and surprise. Imagine your guests biting into these treats and discovering the pink or blue center. It's way more exciting than just cutting a cake. Plus, they're super cute and make fantastic photo props. They are also perfect for those who don't like cake (if such a person exists!). I always love how the anticipation builds as people reach for a cake pop. It makes the reveal even more memorable.
Ingredients for Gender Reveal Cake Pops
Ingredients for Gender Reveal Cake Pops
The Cake Base
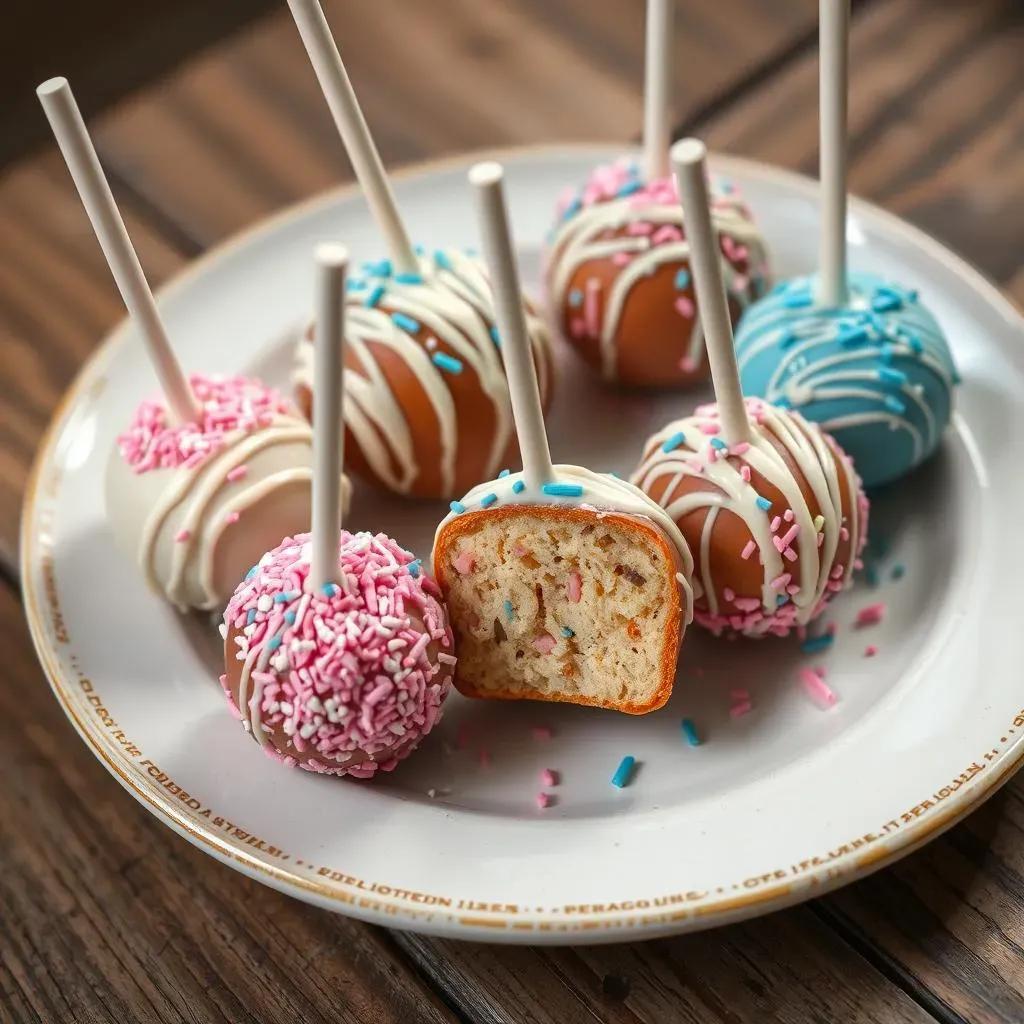
Alright, let's talk about what you'll actually need to make these little guys. First up, the cake! You can use a box of white cake mix to make things super easy. I know, some people are all about from-scratch baking, but honestly, for cake pops, a box mix works perfectly. It's convenient, reliable, and tastes great when combined with frosting. You'll also need the ingredients listed on the box, usually oil, eggs, and water. I usually use the amount of water and oil that it says on the box, but I use one less egg, it makes it more dense. We want a moist cake, not a dry one, you see?
The Frosting and Coloring
Next, you'll need some white frosting. It doesn’t matter if it's store-bought or homemade, whatever floats your boat. We need this to bind the cake crumbs together. Think of it as the glue that holds everything in place. Now for the fun part: the color! You'll need either pink or blue gel food coloring, depending on what you're revealing, of course. Gel coloring is key here; it gives you that vibrant, consistent color without messing up the frosting's consistency. I made the mistake of using liquid food coloring once, and it was a total disaster. So, stick to gel, trust me.
Ingredient | Quantity | Notes |
|---|---|---|
White Cake Mix | 1 box | Plus ingredients listed on the box |
White Frosting | 1 container (16 oz) | Store-bought or homemade |
Gel Food Coloring | As needed | Pink or blue, or both if you are doing a double reveal! |
The Coating and Extras
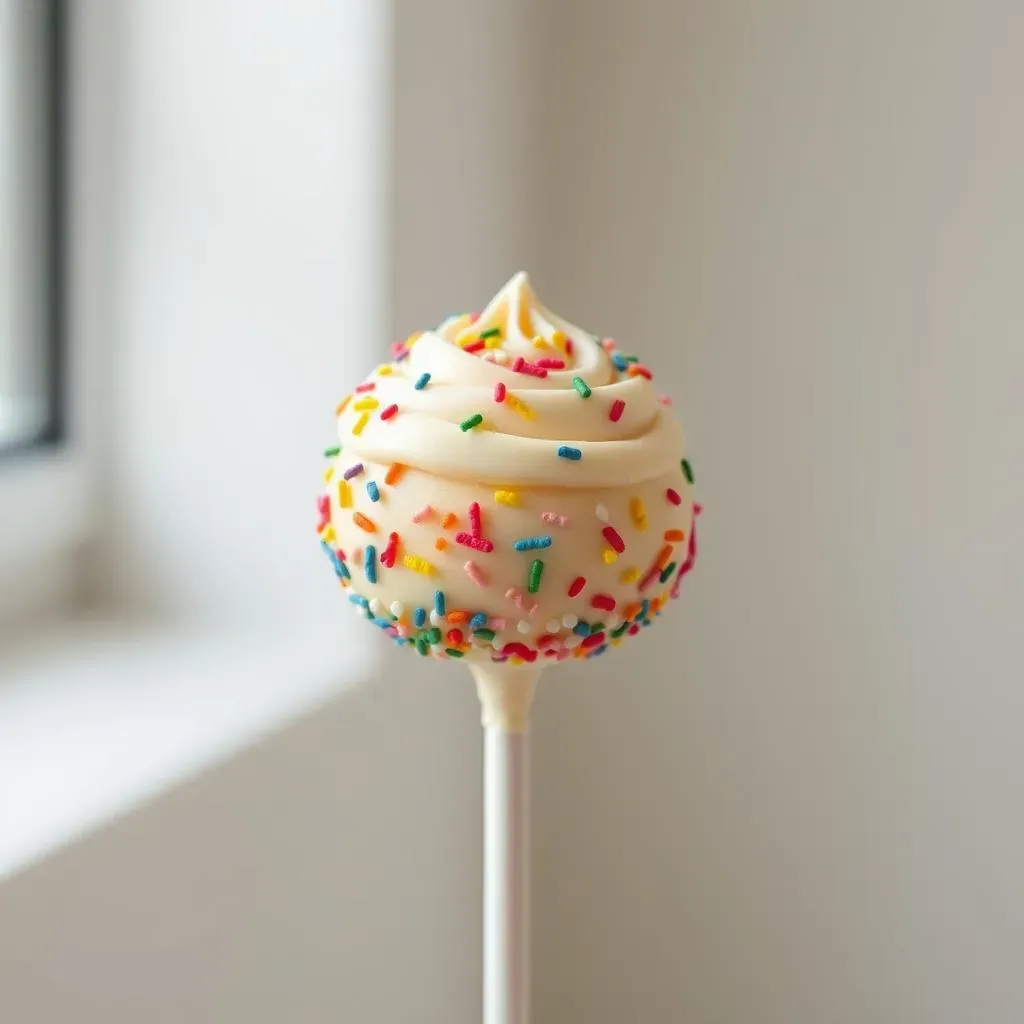
Finally, we need something to coat these little balls of deliciousness. White almond bark is my go-to. It melts smoothly, hardens nicely, and tastes amazing. You can also use candy melts if you prefer, but I find almond bark gives a better finish. And of course, sprinkles! Because what's a cake pop without sprinkles? Pick some cute ones that match your party theme. I’m a big fan of the classic rainbow sprinkles, but you can get as fancy as you want. The key is to have fun with it! You can even use edible glitter for a little extra sparkle.
How to Make Gender Reveal Cake Pops
How to Make Gender Reveal Cake Pops
Bake and Crumble
Alright, let's get to the fun part – making these cake pops! First things first, you need to bake your cake. Follow the instructions on the box, but remember what I said, use one less egg. Once it’s baked, let it cool completely. This is super important! If you try to crumble it while it’s still warm, it’ll be a sticky mess. I usually just let it sit on a wire rack for an hour or so. Once it's cool, it's time to crumble. Get your hands in there and break it up into fine crumbs. No need to be delicate here, just go for it. You want them pretty small, like breadcrumbs. You can also use a food processor if you want, but I find it more fun to do it by hand. It's like therapy, but with cake.
Mix and Roll
Now, grab your frosting. Add it to the cake crumbs and mix everything together. Start with about half the container and add more as needed until the mixture is moist and holds together. You want it to have the consistency of playdough, not too wet and not too dry. If it's too wet, add more cake crumbs; if it's too dry, add a little more frosting. Once it's mixed, it's time to roll. Take small amounts of the mixture, about a tablespoon, and roll them into smooth, even balls. This is where you can get creative, making sure each one is the same size. I like to use a small cookie scoop to make sure they are all the same size, it makes it easier to dip them later. Place the rolled balls on a baking sheet lined with parchment paper and pop them into the fridge for about 30 minutes. This will help them firm up and makes them easier to handle when dipping.
Step | Description |
|---|---|
1 | Bake cake and let cool completely. |
2 | Crumble the cake into fine crumbs. |
3 | Mix in frosting until combined. |
4 | Roll the mixture into even balls. |
5 | Chill cake balls in the fridge for 30 minutes |
Melt and Dip
While your cake balls are chilling, let's get our coating ready. Melt your white almond bark (or candy melts) in a microwave-safe bowl. Do it in 30-second intervals, stirring in between, to avoid burning. You want it smooth and completely melted. Now, take your chilled cake balls out of the fridge. One by one, dip them into the melted coating. I like to use a 2-cup measuring cup for this, it makes it easier to get them fully covered. Let the excess drip off, and place the dipped cake pop back on the parchment paper. If you are doing a gender reveal, be sure to have the right color inside, this is the time to make sure you are doing it right!
Decorate and Set
Immediately after dipping, add your sprinkles! The melted coating will harden quickly, so don’t wait. You can also drizzle with extra melted chocolate or add edible glitter. Let them set completely at room temperature or in the fridge for a faster setting. And that's it! You've made gender reveal cake pops! It's way easier than it sounds, isn’t it? Now they are ready to be the star of your gender reveal party. I always feel so proud when I see the finished product. It's such a fun and creative way to share the news.
Substitutions and Variations
Substitutions and Variations
Cake Flavor Swaps
Okay, so you're not feeling the white cake? No problem! You can totally switch things up. Chocolate cake is a classic, and it works incredibly well with both pink and blue frosting. You could also try a lemon cake for a zesty twist, or even a strawberry cake if you're feeling fruity. Just make sure the cake is dense enough to hold its shape when you roll it into balls. I once used a red velvet cake, and it was a total game-changer, so don't be afraid to experiment! The key is to choose a flavor that complements the overall theme of your party.
Coating and Color Options
White almond bark is my go-to, but it's not the only option. You can use candy melts in various colors to match your party theme. If you want a more vibrant color, try using colored candy melts instead of white. You can also use dark or milk chocolate for a richer flavor. I'm a big fan of adding a little bit of coconut oil to the melting chocolate or candy melts; it makes it smoother and easier to work with. And for an extra touch, try using edible food markers to draw little designs on the cake pops after the coating has set. It’s a fun way to get creative and make each cake pop unique.
Ingredient | Substitution |
|---|---|
White Almond Bark | Candy Melts, Dark Chocolate, Milk Chocolate |
White Cake Mix | Chocolate Cake Mix, Lemon Cake Mix, Strawberry Cake Mix |
Gel Food Coloring | Liquid Food Coloring (use sparingly), Natural Food Coloring |
Adding a Little Extra
Want to take your cake pops to the next level? How about adding a little flavor extract to the cake mix or frosting? Vanilla, almond, or lemon extract can give a subtle hint of extra flavor. You can also try adding mini chocolate chips or chopped nuts to the cake mixture for added texture. And don't forget about the decorations! Use different kinds of sprinkles, edible glitter, or even drizzle with a contrasting color of melted chocolate. I once made a batch with a swirl of white and pink chocolate, and they looked absolutely stunning. It's all about making them look as good as they taste!
Storage for Your Cake Pops
Storage for Your Cake Pops
Room Temperature Storage
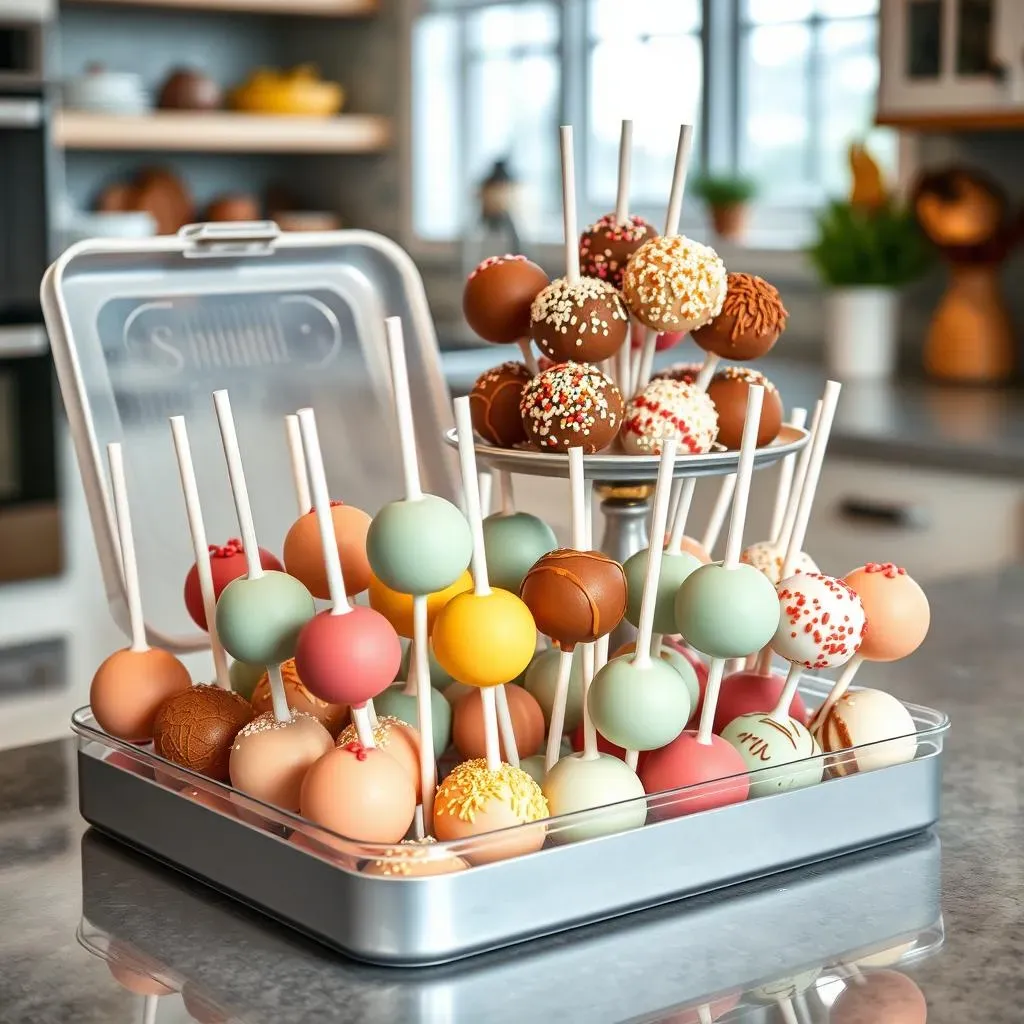
Okay, so you've made these adorable cake pops, and now you're wondering how to keep them fresh. If you're planning to serve them within a day or two, storing them at room temperature is totally fine. Just make sure they're in an airtight container, away from direct sunlight or heat. I usually use a large plastic container with a lid, or a cake pop stand if I'm feeling fancy. The key is to prevent them from drying out. I once left a batch out on the counter overnight, and they were rock hard by morning – not a good look. So, airtight is your best friend here. Think of it like giving them a little cozy home until the party starts.
Refrigerating Your Cake Pops
For longer storage, or if you live in a warmer climate, the fridge is your go-to. Place the cake pops in an airtight container, just like with room temperature storage, but this time, put them in the fridge. This can keep them fresh for up to a week, which is great if you want to prepare them well in advance of your gender reveal party. However, there's a little trick you need to know: condensation. When you take them out of the fridge, condensation can form on the coating, which might make it a little sticky. To avoid this, take them out about 30 minutes before serving, so they can come to room temperature gradually. This way, you get all the deliciousness without any stickiness.
Storage Method | Duration | Tips |
|---|---|---|
Room Temperature | 1-2 days | Store in an airtight container, away from heat and sunlight. |
Refrigerator | Up to 1 week | Store in an airtight container, let come to room temp before serving. |
Freezing Cake Pops
Did you know you can freeze cake pops? Yes, you can! If you want to make them weeks in advance, freezing is the way to go. Wrap each cake pop individually in plastic wrap, then place them in a freezer-safe container. This prevents freezer burn and keeps them from sticking together. When you're ready to use them, take them out of the freezer and let them thaw in the fridge overnight. Just like with refrigeration, be sure to let them sit at room temperature for about 30 minutes before serving so they don't get sticky from condensation. I've frozen cake pops before, and they’ve tasted just as delicious as the day I made them, so it's a great option if you need to plan ahead. It's like having a little stash of deliciousness ready whenever you need it.
What to Serve with Cake Pops
What to Serve with Cake Pops
Sweet Treats Galore
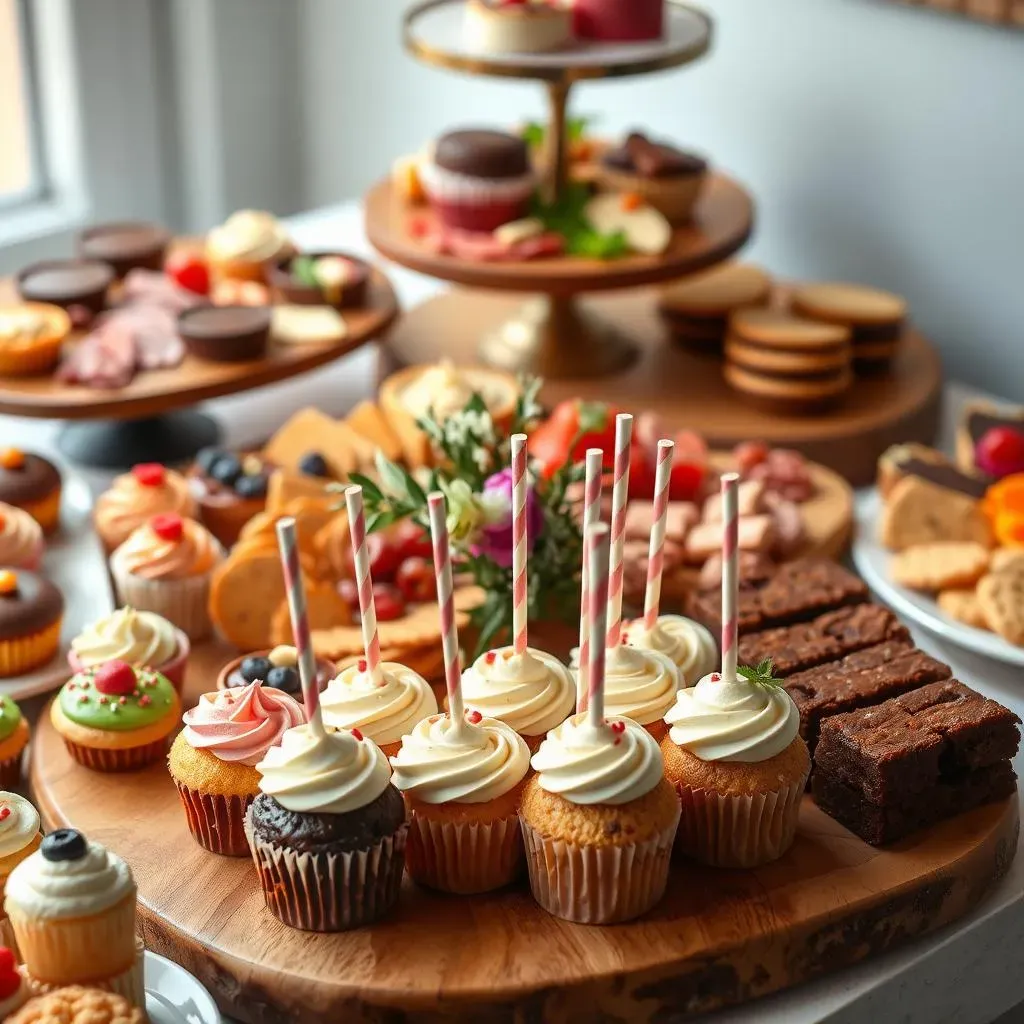
Okay, so you've got your gorgeous gender reveal cake pops, but what else should you serve alongside these little beauties? Well, if you're going for a full-on sugar rush, you can't go wrong with other sweet treats. Think mini cupcakes, brownies, or even a selection of cookies. I'm a big fan of having a variety, so there's something for everyone. It's like creating a dessert buffet, a feast for the eyes and the taste buds. I remember going to a party where they had a chocolate fountain alongside the cake pops, it was a total hit. The kids (and adults) went wild for it!
Savory Options for Balance
Now, if you're like me, you probably don't want to OD on sugar, so it's a good idea to offer some savory options as well. A charcuterie board is always a crowd-pleaser, with a mix of cheeses, meats, and crackers. You could also do some mini sandwiches or wraps, or even some cheesy mushroom appetizer toasts. I went to a party once where they had a taco bar, and it was surprisingly perfect. The savory options really help balance out the sweetness of the cake pops. Plus, it's nice to have something a little more substantial for guests who are hungry. It's all about creating a balanced spread that caters to everyone's tastes.
Category | Examples |
|---|---|
Sweet Treats | Mini Cupcakes, Brownies, Cookies, Chocolate Fountain |
Savory Bites | Charcuterie Board, Mini Sandwiches, Cheesy Mushroom Toasts, Taco Bar |
Tips for Perfect Cake Pops
Tips for Perfect Cake Pops
Chill Out, Literally
Okay, so you've got your cake balls all rolled and ready to go, but before you even think about dipping them, you need to chill them out. Seriously, this is not optional. Popping those little guys in the fridge for at least 30 minutes is crucial, I usually do an hour, if I have the time. This step firms them up, making them way easier to handle when you're dipping. Imagine trying to dip a warm, squishy ball of cake—it's a total nightmare! They'll fall apart, the coating will be a mess, and you'll end up throwing the whole batch in the trash. So chill them, it's the secret weapon to a smooth, perfect cake pop. I learned this the hard way, the first time I tried to make cake pops, I skipped this step and they were a disaster.
The Dipping Game
Now, let's talk dipping. This is where things can get a little tricky, but I promise, it's manageable. First off, use a tall, narrow container for your melted coating. A 2-cup measuring cup works perfectly because it lets you fully submerge the cake pop without having to tilt the cup too much. When you dip, make sure the cake pop is fully covered and then let the excess drip off. A gentle tap on the side of the cup can help with this. And don't wait too long to add your sprinkles! The coating hardens pretty quickly, so you need to be ready to decorate as soon as they're dipped. I like to have all my sprinkles and decorations laid out before I even start dipping, that makes the process much smoother.
Tip | Why it Matters |
|---|---|
Chill Cake Balls | Firms them up, makes dipping easier. |
Use a Tall Container | Allows for full submersion of cake pops. |
Tap Off Excess Coating | Prevents thick, uneven coating. |
Decorate Quickly | Ensures sprinkles adhere to the coating. |
Dealing with Cracks
Sometimes, despite your best efforts, those annoying cracks can appear in the coating. The most common reason for this is temperature shock, meaning the cake ball was too cold or the coating was too hot. If you notice cracks, try letting the cake balls sit out for a bit longer before dipping. Also, make sure your coating isn't scorching hot; it should be melted smoothly, not boiling. I find that adding a tiny bit of coconut oil to the melted coating helps prevent cracks. And if all else fails, don't stress too much. You can always cover up those little imperfections with extra sprinkles or a drizzle of melted chocolate. Remember, even the pros have their share of mishaps, so don’t beat yourself up over it.
Crumbly Cake Balls?
Another common problem is cake balls that are too crumbly. This usually happens when there isn’t enough frosting to bind the crumbs together. If your mixture is too dry, add more frosting, a little at a time, until it reaches the right consistency. Remember, you're aiming for a playdough-like texture, not too wet and not too dry. If you've already added too much frosting and the mixture is too wet, you can add more cake crumbs. It's all about finding that perfect balance. I have a friend that had to add some powdered sugar because she added too much frosting, it worked like a charm. The process isn't always perfect, so just take it step by step and adjust as you go.
FAQ About Gender Reveal Cake Pops
FAQ About Gender Reveal Cake Pops
Why Did My Candy Coating Crack?
Okay, let's tackle the dreaded cracked coating. It's a common issue, and it's usually down to temperature differences. If your cake balls are super cold and the melted coating is too hot, the rapid change in temperature can cause the coating to crack as it hardens. Think of it like putting an ice cube in hot water; it's a shock to the system. To avoid this, make sure your cake balls aren't straight from the freezer; give them a little time to warm up slightly in the fridge. Also, keep an eye on your melted coating, it should be melted, not boiling. I usually melt mine in short intervals in the microwave, stirring in between, to prevent overheating. I also add a tiny bit of coconut oil to it, it helps a lot.
Another thing that can cause cracking is a coating that's too thick. If you're dipping your cake pops in a thick layer of melted chocolate, it's more likely to crack as it hardens. Make sure to tap off the excess coating, that helps a lot. If you do end up with a few cracked cake pops, don't panic! You can usually hide the cracks with extra sprinkles or a drizzle of melted chocolate. I have done that many times. It's like a little cake pop makeover, nobody will even notice.
Problem | Solution |
|---|---|
Cracked Coating | Avoid temperature shock, melt coating gently, tap off excess. |
Crumbly Cake Balls | Add more frosting, a little at a time, until the mixture holds together. |
Coating Too Thick | Tap off the excess coating. |
Why Are My Cake Balls So Crumbly?
Crumbly cake balls are another common headache, but they're easily fixed. The main reason why your cake balls might be falling apart is not enough frosting. Think of frosting as the glue that holds the cake crumbs together. If you don’t have enough, the mixture won’t bind properly. The key is to add frosting gradually, a little at a time, until the mixture reaches a playdough-like consistency. It should hold its shape when you roll it into a ball, but not be too sticky. If you do add too much frosting, you can add more cake crumbs to balance it out. It's all about finding the perfect balance. I've had to do this a few times; it's like a little science experiment in the kitchen.
Another thing to consider is the type of cake you're using. If you're using a cake that's naturally dry, like a sponge cake, you might need a little more frosting to bind it together. I prefer to use a box cake because they are usually very moist. Also, if your cake is too dry, it can be hard to work with. So, be sure to bake it correctly, and don't overbake it. It's all about paying attention to the details. With a little practice, you'll be making perfectly moist and rollable cake balls every time.