Table of Contents
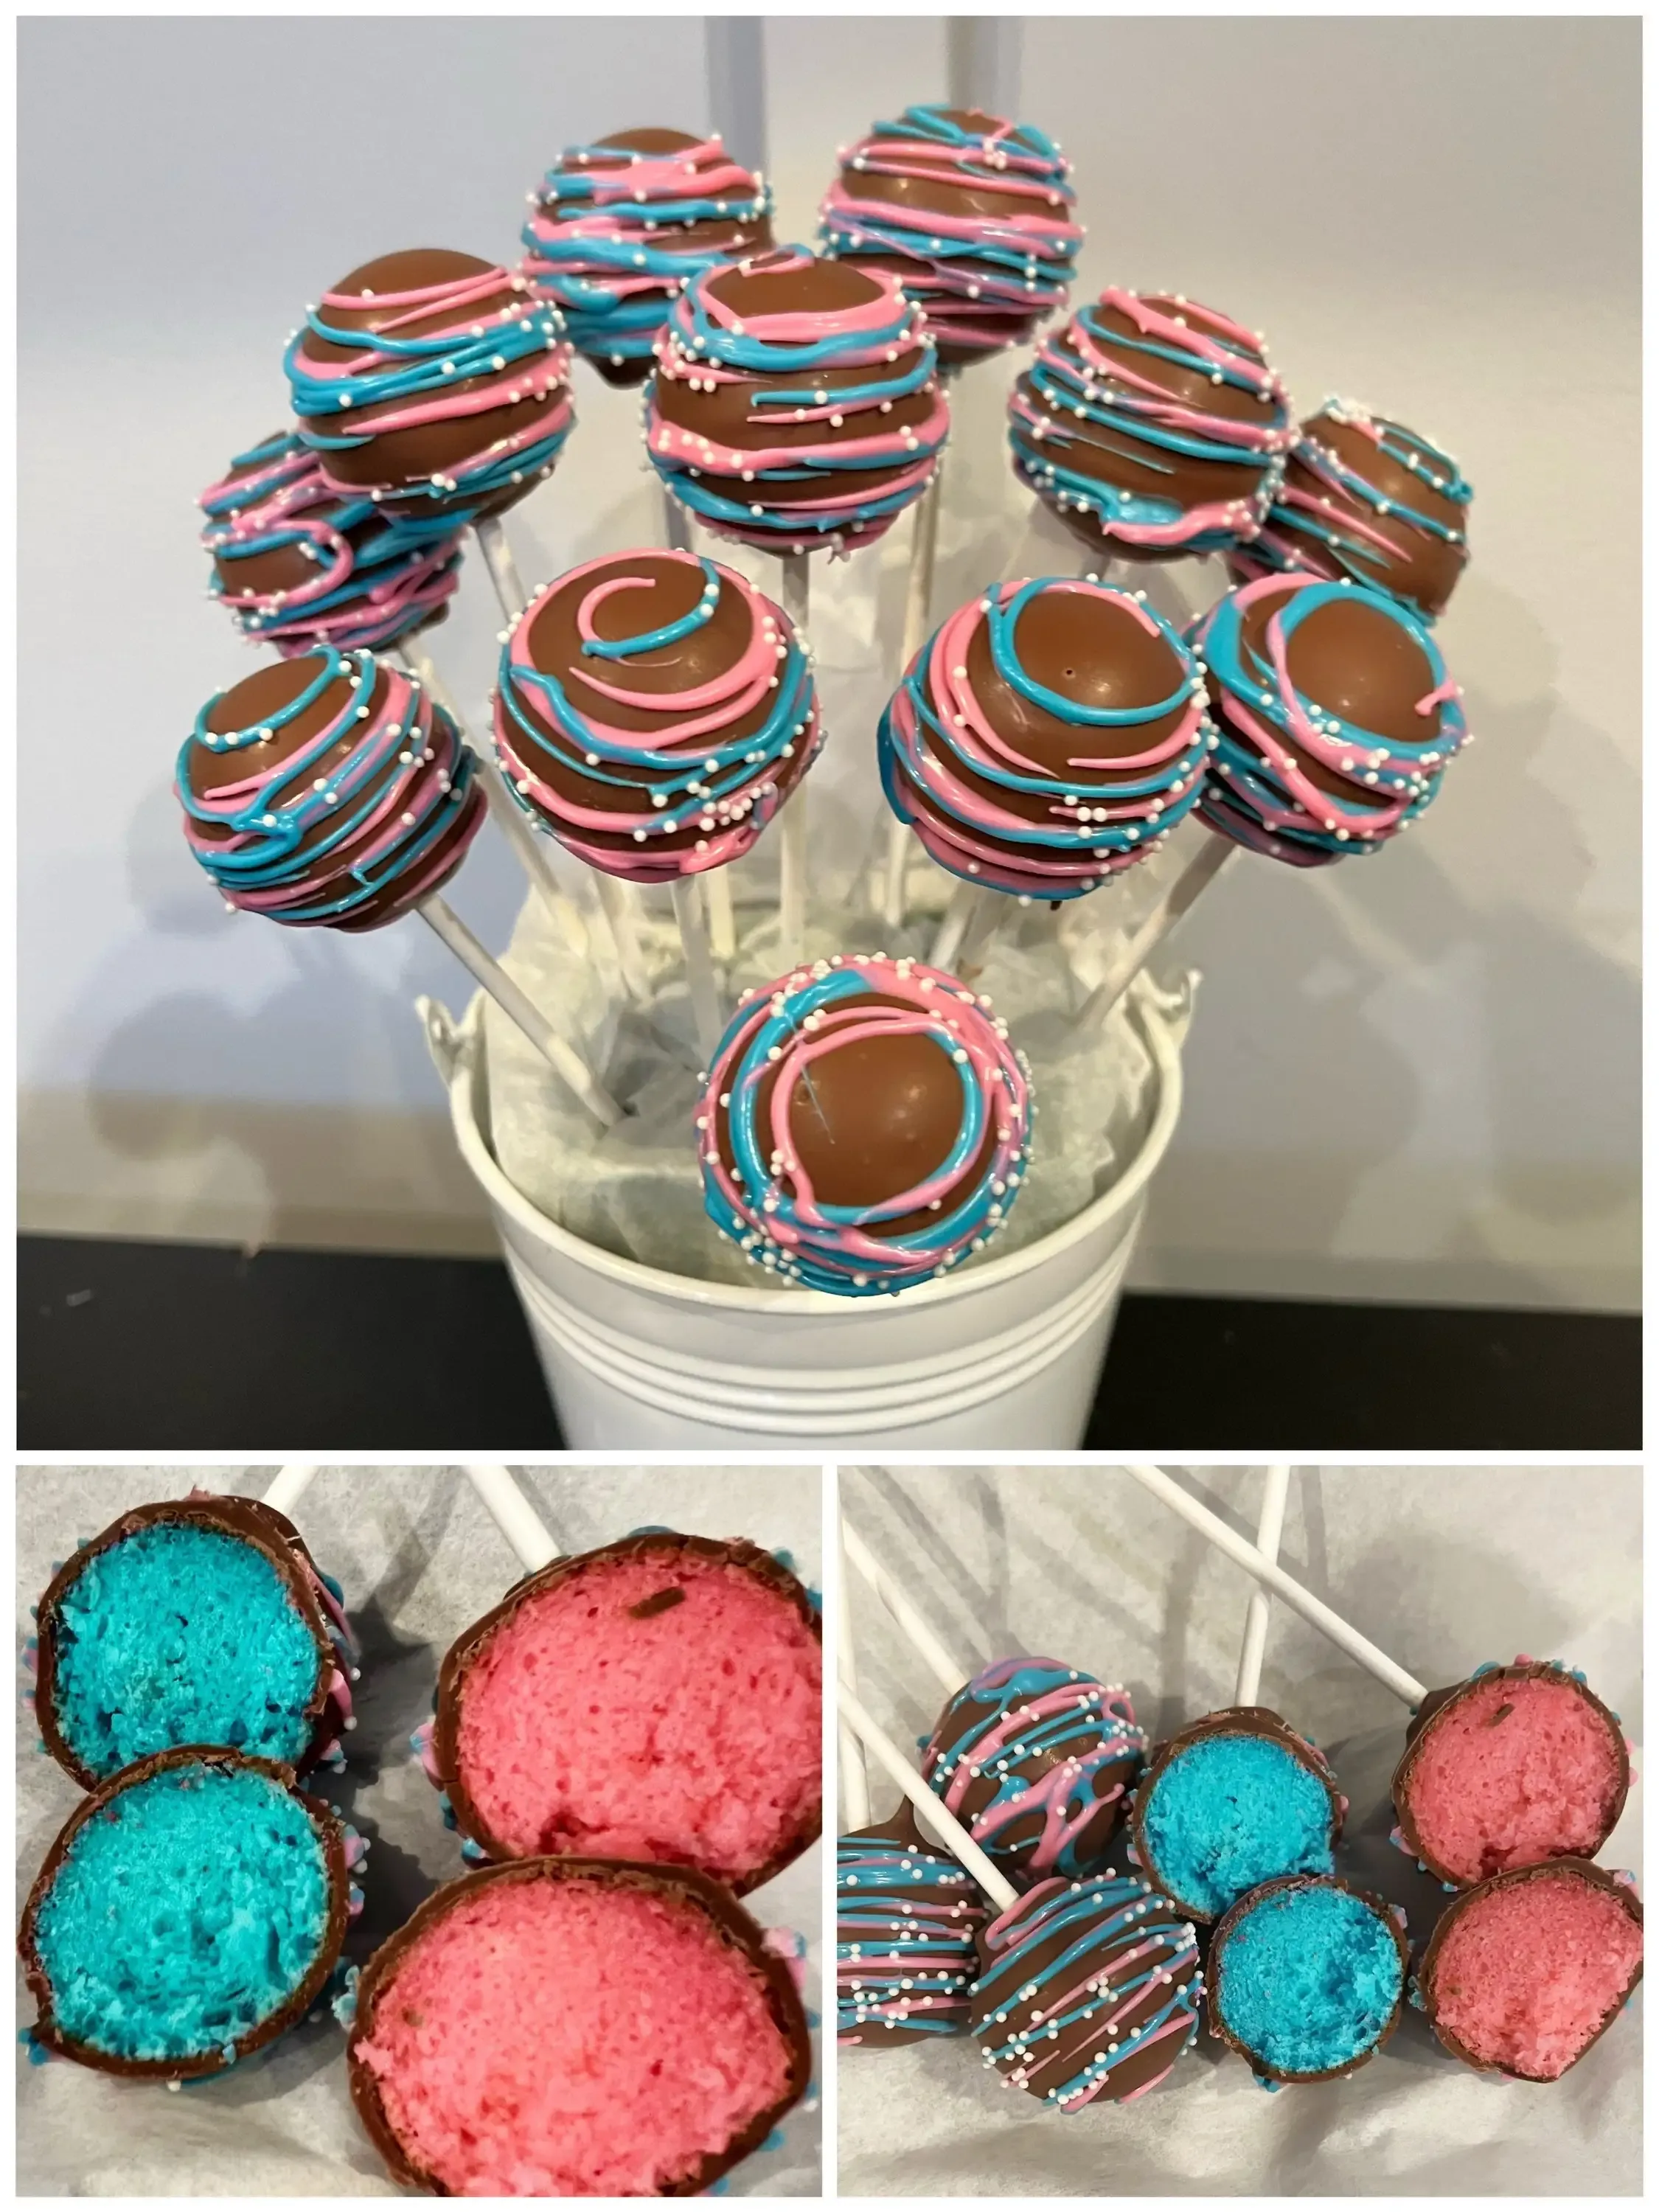
So, you're planning a gender reveal. The pressure is on to make it memorable, maybe even Instagram-worthy, without accidentally setting a field on fire or causing a minor explosion. Forget elaborate fireworks or dyed rivers (seriously, folks, stop that). Sometimes, the sweetest way to share the big news is, well, with sweets. Specifically, thinking about gender reveal cake pops ideas.
Simple and Sweet Gender Reveal Cake Pops Ideas

Simple and Sweet Gender Reveal Cake Pops Ideas
Alright, let's kick this off with the basics, the go-to strategies for Simple and Sweet Gender Reveal Cake Pops Ideas that won't have you pulling your hair out. Think classic, clean, and effective. The core idea here is a white or light-colored candy coating on the outside – maybe white, light yellow, or even a soft pastel that hints at the baby theme without giving anything away – covering that vibrant pink or blue cake goodness hidden inside. You don't need fancy molds or intricate piping skills yet. Just focus on getting a smooth coating and a sturdy stick. This approach is fantastic for beginners and still delivers that crucial "pop!" of color when someone takes a bite. It's the foundation, the bread and butter of this whole operation.
Beyond Basic: Creative Gender Reveal Cake Pops Designs
Beyond Basic: Creative Gender Reveal Cake Pops Designs
Adding Flair with Color and Texture
so you've mastered the simple dip. Now let's talk about kicking your gender reveal cake pops ideas up a notch. You don't have to be a pastry artist to add some personality. Think about using more than just one solid color on the outside. Maybe you dip the whole pop in white, then drizzle contrasting colors over it – a gold shimmer, a silver sparkle, or even swirls of light pink and blue that still keep the core secret safe. Sprinkles are your friend here; they hide imperfections and add fun texture. You can use non-pariels, edible glitter, or even themed sprinkles like tiny stars or hearts.
Consider layering. Dip in one color, let it set, then dip just the very bottom in another color for a subtle two-tone effect. Or how about using edible markers? You can draw simple patterns like dots, stripes, or even tiny question marks on the outside. These little details make your gender reveal cake pops ideas feel more special and less like a rush job.
Getting Fancy with Shapes and Themes
Ready to really impress? Let's explore some more creative gender reveal cake pops ideas that play with shape or theme. Instead of just round balls, you can gently shape the cake dough before chilling. Think mini hearts, little stars, or even tiny baby bottle shapes if you're feeling ambitious. There are even molds available that can help with this, though shaping by hand is totally doable with a little practice.
Theming is another way to get creative. If your reveal party has a specific theme – like "Twinkle Twinkle Little Star" or "What Will It Bee?" – you can decorate the outside of the pops to match. Use yellow and black stripes for a bee theme, or silver and gold edible dust for stars. These themed gender reveal cake pops ideas tie the treat directly into your party decor and add another layer of fun for your guests before they even take a bite.
- Drizzle contrasting candy melts over a solid base.
- Apply themed sprinkles or edible glitter before the coating sets.
- Create a subtle two-tone effect by dipping the bottom in a second color.
- Use edible markers for simple hand-drawn patterns.
- Shape the cake dough into hearts, stars, or other simple forms.
- Decorate pops to match your party's specific theme.
Making Perfect Gender Reveal Cake Pops: Tips and Tricks

Making Perfect Gender Reveal Cake Pops: Tips and Tricks
Getting the Dough Just Right
Alright, let's talk about the foundation of great gender reveal cake pops: the dough. This isn't just crumbled cake mixed with frosting; it's a specific consistency you're aiming for. Think Play-Doh, not mud. Too much frosting and your pops will be greasy and heavy, prone to sliding off the stick. Too little, and they'll be dry and crumbly, falling apart before you even get them dipped. The key is adding the frosting a spoonful at a time to your crumbled cake. Mix it in, then test it. Does it hold its shape when you roll it into a ball? Does it feel firm but pliable? That's your sweet spot for making perfect gender reveal cake pops.
Chilling is Non-Negotiable
Seriously, do not skip the chilling steps when you're making gender reveal cake pops. Once you've rolled your cake dough into balls (or whatever fun shape you chose), they need time in the fridge or freezer. This firms them up significantly, making them much easier to handle and dip. Trying to dip a room-temperature cake ball is a recipe for disaster; it will likely fall apart or create a lumpy, uneven coating. After they've chilled for at least 30 minutes in the fridge or 15 in the freezer, dip the tip of your stick into melted candy coating, then insert it about halfway into the cake ball. This acts like glue, securing the stick to the pop. Pop them back in the fridge for another 10-15 minutes before the final dip. This ensures the stick is firmly set and the pop is cold enough to handle the warm coating.
- Is your cake dough too sticky? Add a little more crumbled cake.
- Is it too dry? Add a tiny bit more frosting, literally half a teaspoon at a time.
- Did you chill them long enough? They should feel quite firm.
- Is your candy coating too thick for dipping?
Mastering the Candy Coating Dip
This is where many dreams of perfect gender reveal cake pops wither and die. The candy coating can be finicky. First, make sure you're using actual candy melts or a quality chocolate designed for melting and dipping, not chocolate chips (they contain stabilizers that make them harder to melt smoothly). Melt it gently, either in a microwave safe bowl in 30-second intervals, stirring each time, or in a double boiler. You want it smooth and liquid, not clumpy or scorching hot. If it's too thick, add a tiny bit of shortening or a special candy melt thinning agent – avoid adding oil or butter unless the package specifically says to. Dip the chilled pop in one smooth motion, letting the excess drip back into the bowl. Twist gently if needed, but don't overwork it. Too much fussing means drips and an uneven finish. Get that coating on, add sprinkles or decorations quickly before it sets, and stick the pop upright in a Styrofoam block or cake pop stand to dry completely.
Solving Problems with Gender Reveal Cake Pops

Solving Problems with Gender Reveal Cake Pops
Why Your Coating Cracks (and How to Fix It)
So, you've got your perfectly chilled cake pops, you dip them in that smooth candy coating, and then... tragedy strikes. Cracks appear, sometimes spiderwebbing across the surface, sometimes splitting wide open. It's frustrating, especially when you've put in the effort to make these special gender reveal cake pops. The main culprit here is temperature shock. Your cold cake pop hits warm, sometimes hot, candy coating, and the sudden change causes the coating to contract and break. Ensure your candy melts aren't too hot; melting them slowly and stirring frequently prevents overheating. Also, let your chilled pops sit out for just a few minutes before dipping. You don't want them warm, but taking the absolute edge off the cold can make a difference. Dipping quickly and smoothly also helps; less time in the coating means less temperature change.
Pops Sliding Off Sticks? Here's Why
Another classic cake pop fail: the pop plummets from its stick before it even makes it to the drying rack. This usually happens for a couple of reasons. First, you might not be using that little dab of melted candy coating as glue before inserting the stick. That step is crucial; it creates a solid anchor. Second, your cake dough might be too soft or greasy. If you added too much frosting, the dough won't hold its shape or grip the stick properly, especially as it warms up slightly during dipping. Make sure your dough is firm enough to roll into a stable ball that keeps its form. Lastly, ensure you insert the stick far enough into the pop, at least halfway, to give it good leverage.
Problem | Likely Cause | The Fix |
|---|---|---|
Coating Cracks | Temperature shock (cold pop, hot coating) | Let pops sit briefly before dipping; don't overheat coating. |
Pop Falls Off Stick | No "glue," dough too soft, stick not inserted enough | Use melted coating as glue; ensure firm dough; insert stick halfway. |
Lumpy Coating | Overheated or poor quality melts | Melt gently, stir often; use quality candy melts; thin with shortening if needed. |
Dealing with Lumps and Thickness
Sometimes, your beautiful melted candy coating turns into a thick, lumpy mess that's impossible to dip smoothly. This often happens if the melts get too hot, seizing up, or if even a tiny drop of water gets into the mixture. Once seized by water, it's tough to recover completely, but overheating can sometimes be fixed. Try stirring vigorously off the heat, or add a small amount of shortening (specifically Crisco or a similar solid vegetable shortening, not butter or oil unless specified) or a dedicated candy melt thinning agent. Add it gradually, stirring until you reach the desired consistency. You want it fluid enough for a quick, smooth dip, not like trying to coat a ball in peanut butter. Getting the right consistency is key to achieving those picture-perfect gender reveal cake pops.
Storing and Sharing Your Gender Reveal Cake Pops
Storing and Sharing Your Gender Reveal Cake Pops
Alright, you've put in the work, you've got a perfect batch of gender reveal cake pops ready to go. Now what? You can't just leave these delicate little bombs of information sitting out indefinitely. Properly Storing and Sharing Your Gender Reveal Cake Pops is key to making sure they taste great and don't melt into sad puddles or get stale before the big moment. If your party is happening within a day or two, they're usually fine stored in an airtight container at cool room temperature, away from direct sunlight or heat sources that will make the candy coating weep or soften. For longer storage, or if your house runs warm, the fridge is your friend. Pop them in that same airtight container, and they'll keep well for a week or two. Just let them sit out for 10-15 minutes before serving so the cake inside isn't brick-hard. When it's time to share, individual cellophane bags tied with a ribbon look sharp and make them easy for guests to grab without getting sticky fingers everywhere.
Wrapping Up Your Sweet Reveal
So there you have it. We've navigated the sometimes-treacherous waters of making gender reveal cake pops ideas a reality. You've got the lowdown on getting the cake-to-frosting ratio right, dipping without the drip disaster, and adding those little touches that make them pop (pun intended). Forget the smoke bombs that turn the neighborhood blue or the balloon pop that just... doesn't. These little cake balls offer a controlled, tasty moment of anticipation. They're proof that sometimes the biggest surprises come in the smallest, sweetest packages. Now go forth, bake, dip, and reveal – hopefully without any major confectionery catastrophes.