Table of Contents
Planning a gender reveal party? Forget the expensive kits and generic themes! This article is your ultimate guide to crafting unforgettable gender reveal party ideas DIY style. We're diving headfirst into a world of creative, budget-friendly, and personalized celebrations that will have your guests "oohing" and "aahing." From dazzling DIY decorations that scream "baby," to quirky games that keep everyone guessing, we've got you covered. Get ready to roll up your sleeves and unleash your inner party planner! We'll explore innovative ways to transform your space, tantalize taste buds with themed treats, and capture those precious reveal moments with DIY photo booths and keepsakes. So, ditch the store-bought clichés and let's create a gender reveal party that's as unique and special as your little one-to-be. Get ready for an exciting adventure filled with balloons, confetti, and lots of love!
Creative DIY Gender Reveal Party Ideas on a Budget
Creative DIY Gender Reveal Party Ideas on a Budget
Think Outside the Box: Free & Low-Cost Themes
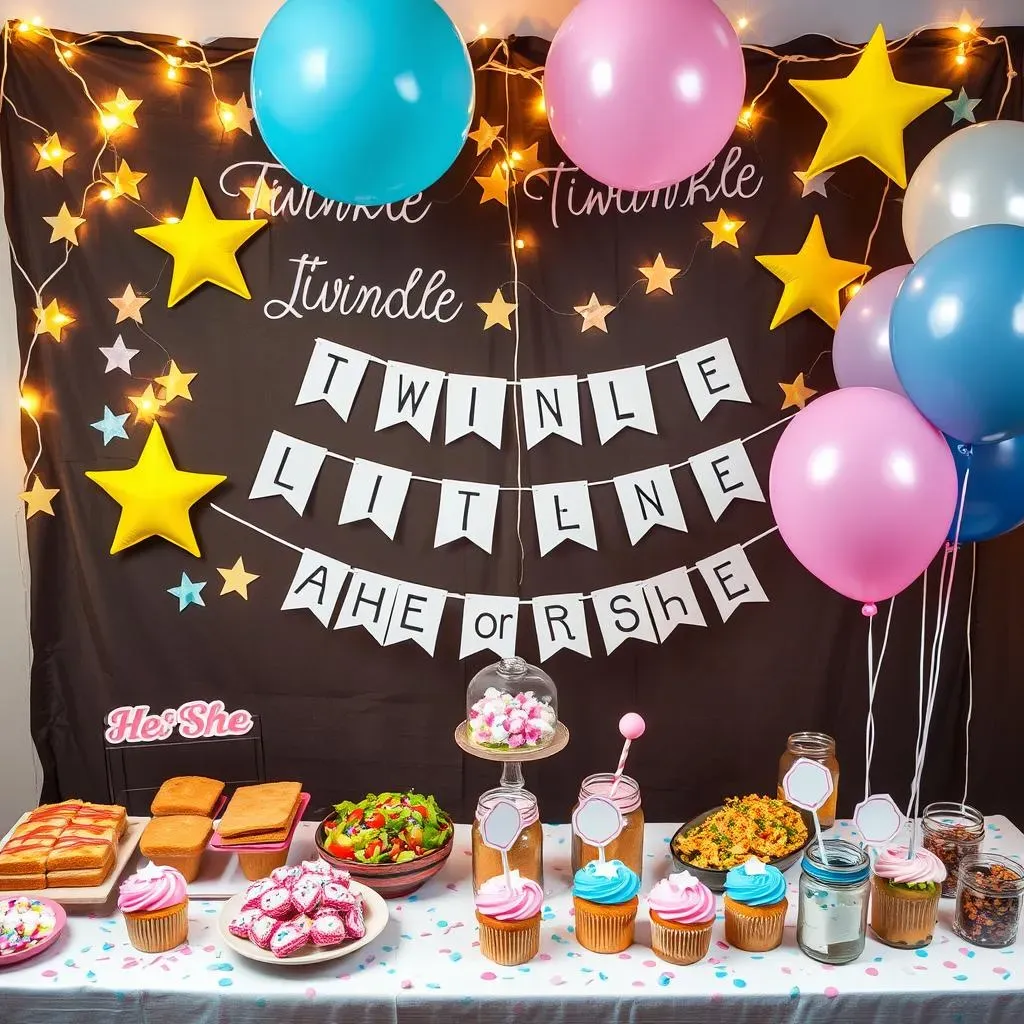
Forget the generic "prince or princess" overload. Let's brainstorm some unique and thrifty themes! How about a "Twinkle Twinkle Little Star" party using repurposed fairy lights and DIY star decorations? Or a "What Will It Bee?" theme with black and yellow streamers and homemade honey-flavored treats? The possibilities are endless, and the best part? Many of these themes rely on items you already have or can easily source for cheap. Hit up your local dollar store, craft store clearance section, or even your own attic for hidden gems. One time, a friend of mine threw a "Taco 'Bout a Baby" fiesta using mostly supplies she already had for previous parties. It was a huge hit and barely cost her anything!
Consider the season, too. A fall-themed reveal could incorporate colorful leaves and pumpkins, while a winter wonderland theme could use faux snow and DIY snowflakes. Online resources like Pinterest are goldmines for visual inspiration, but don't feel pressured to replicate everything exactly. Use those ideas as a jumping-off point to create something truly original and budget-friendly.
DIY Decorations That Wow (Without Breaking the Bank)
Ditch the expensive party store decorations and get crafty! Balloons are a classic, but instead of buying pre-filled gender reveal balloons, opt for plain pink and blue balloons and fill them yourself with confetti. DIY banners are also a fun and easy way to personalize your party. Use free online templates or create your own using cardstock, paint, and ribbon. Remember the "He or She" banner? It's a classic for a reason!
Another great idea is to create a DIY photo booth backdrop using streamers, balloons, and props. Guests will love taking pictures, and it's a fun activity that doesn't cost much. Don't underestimate the power of repurposed materials! Old mason jars can be transformed into adorable centerpieces with a little paint and ribbon. Empty cardboard boxes can be used to create fun games or decorations. Get creative and see what you can repurpose to save money.
DIY Decoration | Estimated Cost | Materials Needed |
|---|---|---|
Confetti Balloons | $5-10 | Balloons, confetti, helium (optional) |
DIY Banner | $3-7 | Cardstock, paint, ribbon, scissors |
Photo Booth Backdrop | $10-15 | Streamers, balloons, props, tape |
Food & Fun on a Dime: Sweet Treats and Savory Snacks
Food doesn't have to be fancy to be delicious! Instead of catering, opt for a potluck-style party where guests bring a dish to share. This not only saves you money but also adds a personal touch to the celebration. If you're handling the food yourself, focus on simple and affordable options like sandwiches, salads, and dips. For a sweet treat, bake a cake or cupcakes and decorate them with pink and blue frosting or sprinkles. A simple vanilla cake with a colored filling is a classic gender reveal treat.
Presentation is key! Even the simplest snacks can look amazing with a little creativity. Use cute cupcake liners, colorful napkins, and DIY food labels to add a festive touch. Consider setting up a "guess the gender" snack bar with pink and blue candies or cookies. Guests can vote with their taste buds! Remember, the goal is to celebrate the upcoming arrival of your little one, not to impress your guests with an extravagant feast.
DIY Gender Reveal Decorations: Balloons, Banners, and More
DIY Gender Reveal Decorations: Balloons, Banners, and More
Balloon Bonanza: Beyond Pink and Blue
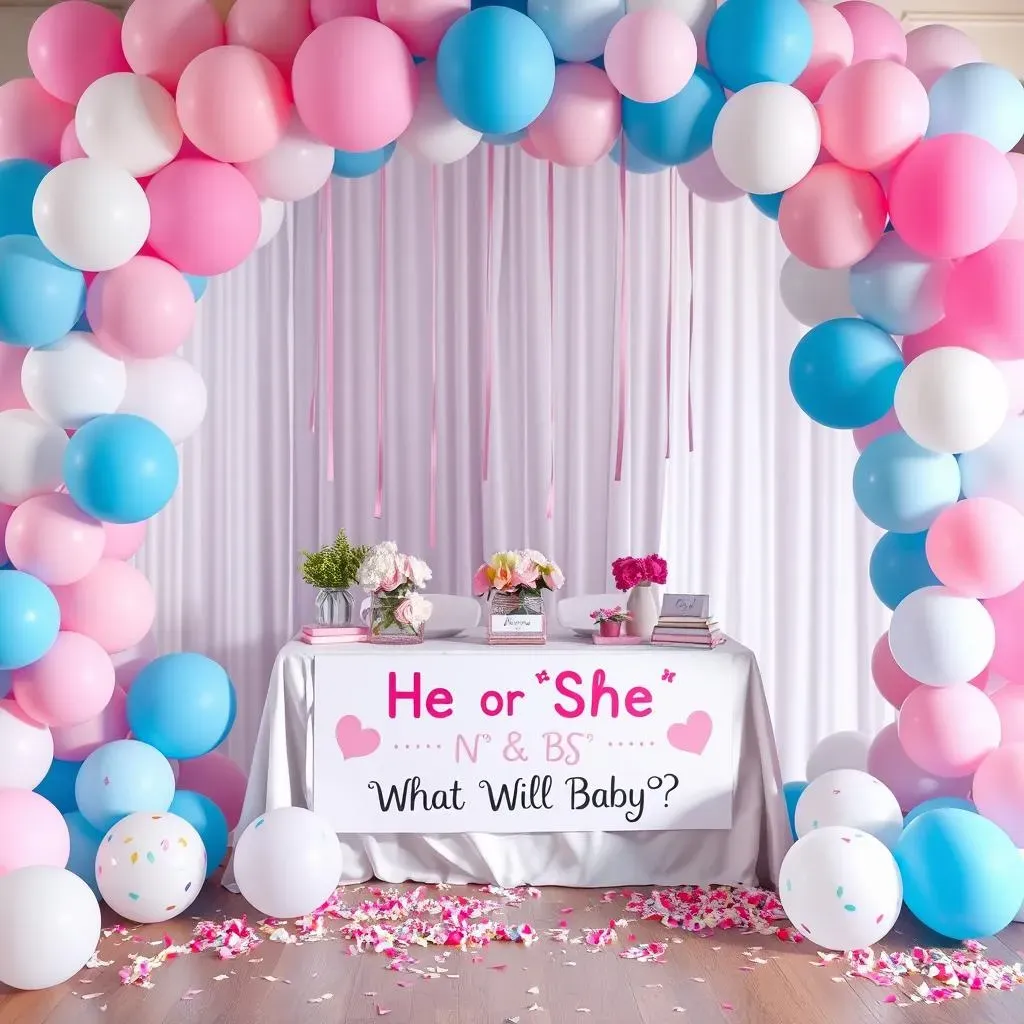
so balloons are a gender reveal staple, right? But let's kick it up a notch! Instead of just grabbing a pack of pink and blue, think about creating a whole balloon installation. Imagine a cascading archway of balloons in varying shades of pink, blue, and white, creating a stunning visual impact as guests arrive. Or, how about a giant balloon box filled with pink or blue balloons that you release at the big moment? Talk about a photo op! Don't forget about confetti balloons for an extra burst of excitement. You can easily DIY these by inserting confetti into clear balloons before inflating them. Trust me; it's worth the extra effort.
Pro tip: Use different sizes and textures of balloons to add depth and interest to your decorations. Metallic balloons, for example, can add a touch of glam, while matte balloons can create a more subtle and sophisticated look. And remember, helium isn't the only option! You can create balloon garlands and attach them to walls or furniture for a budget-friendly alternative.
Banners That Pop: Personalized and Proud
Forget the generic "It's a Boy!" or "It's a Girl!" banners. Let's get personal! DIY banners are a fantastic way to showcase your creativity and add a unique touch to your gender reveal party. You can create banners using all sorts of materials, from cardstock and fabric to burlap and even old book pages. Get creative with the lettering! Use stencils, freehand paint, or even print out letters from your computer. And don't be afraid to add embellishments like ribbons, glitter, or even small baby-themed trinkets.
Consider incorporating the baby's name (if you've already chosen one) or a special message into your banner. How about a banner that says "Little Man or Little Miss?" or "He or She, What Will Baby Be?" You can also create a banner that reflects your chosen theme. For example, if you're having a "Twinkle Twinkle Little Star" party, you could create a banner with star-shaped cutouts and glittery lettering. The possibilities are endless! And the best part? You can keep your DIY banner as a keepsake after the party.
DIY Banner Idea | Materials | Tips |
|---|---|---|
Cardstock Banner | Cardstock, scissors, string, glue | Use stencils for neat lettering, add glitter or ribbon |
Fabric Banner | Fabric scraps, scissors, sewing machine (optional), glue | Use different fabric patterns for a patchwork effect |
Burlap Banner | Burlap, paint, stencils, string | Create a rustic look, add lace or twine |
Unique DIY Gender Reveal Games and Activities
Unique DIY Gender Reveal Games and Activities
Guessing Games Galore: Beyond the Ballot Box
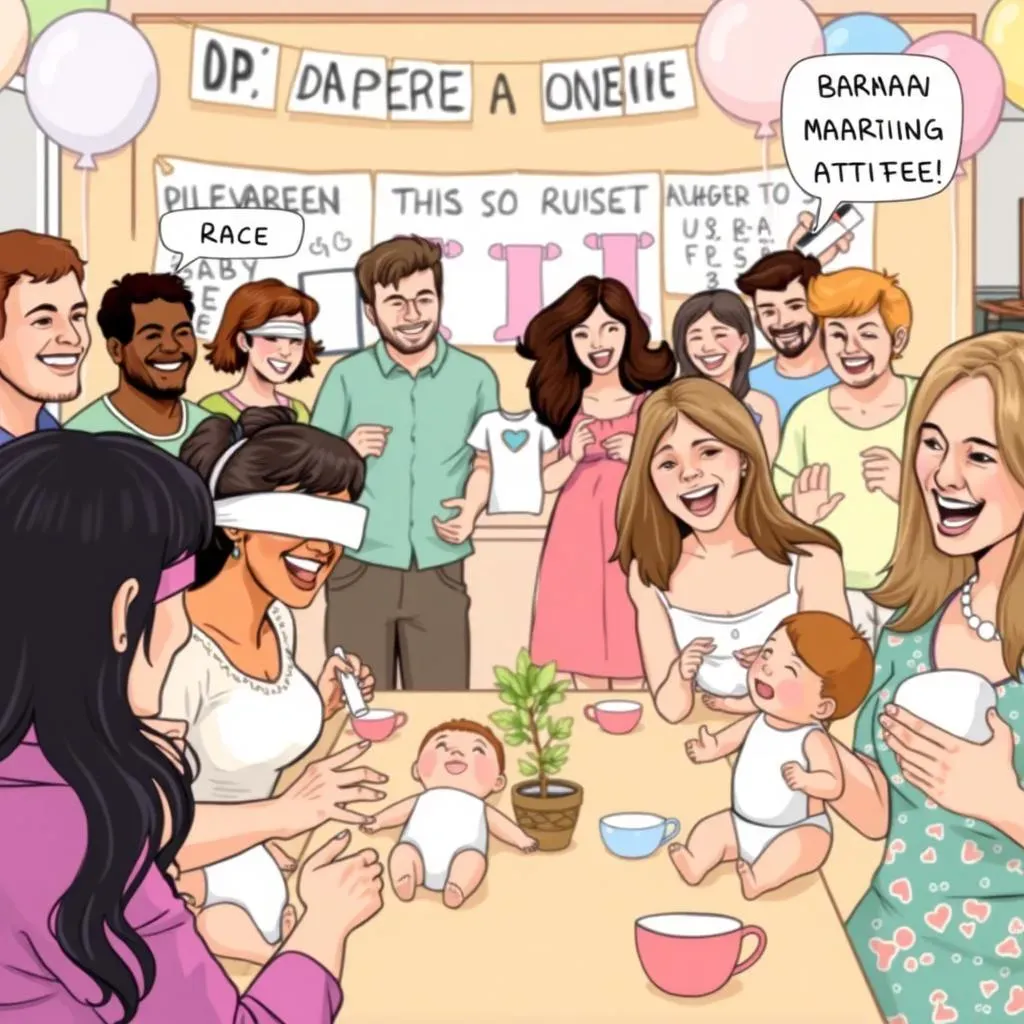
so everyone does the "guess the gender" ballot box, right? Let's ditch the predictable and amp up the fun! How about a "Diaper Changing Race" with baby dolls? Teams compete to see who can change a diaper the fastest (blindfolded, of course!). Or, create a "Baby Food Taste Test" where guests have to guess the flavor of different baby food purees. Trust me, it's hilarious to watch people's reactions! Another fun idea is a "Baby Item Scavenger Hunt" where guests have to find hidden baby items around the party area. The first one to find everything wins a prize!
Want something a little more sentimental? Create a "Wishes for Baby" station where guests can write down their hopes and dreams for the little one. You can provide cute cards or even have them write directly on a large poster. These wishes will be a cherished keepsake for years to come. Remember, the key is to get everyone involved and create a fun and interactive atmosphere. Ditch the passive games and opt for activities that will have your guests laughing and making memories.
Crafty Creations: DIY Activities for All Ages
Why not incorporate a DIY craft activity into your gender reveal party? This is a great way to keep guests entertained and create a unique keepsake for the parents-to-be. Consider setting up a "Decorate a Onesie" station where guests can personalize plain white onesies with fabric markers, stencils, and iron-on patches. Or, create a "Make a Baby Bracelet" station with beads, charms, and elastic string. Guests can create bracelets for themselves or for the baby.
Another fun idea is to set up a "Design a Nursery" station with magazines, construction paper, and glue. Guests can create their dream nursery designs and present them to the parents-to-be. This is a great way to get everyone involved in the anticipation of the baby's arrival. And don't forget about the little ones! Provide coloring pages, crayons, and stickers to keep them entertained. Remember, the goal is to create a fun and inclusive activity that everyone can enjoy.
DIY Activity | Materials | Tips |
|---|---|---|
Decorate a Onesie | Plain onesies, fabric markers, stencils, iron-on patches | Provide a variety of colors and designs, protect the surface |
Make a Baby Bracelet | Beads, charms, elastic string, scissors | Choose baby-safe materials, supervise children |
Design a Nursery | Magazines, construction paper, glue, scissors | Provide a variety of magazines, encourage creativity |
Delicious DIY Gender Reveal Food and Drink Ideas
Delicious DIY Gender Reveal Food and Drink Ideas
Pink or Blue, What's Brewing? Themed Drink Stations
Let's talk drinks! A themed drink station is a fantastic way to add a splash of color and excitement to your gender reveal party. Think beyond basic pink lemonade and blue raspberry soda. Get creative! How about a "Pink Paradise" punch with cranberry juice, ginger ale, and strawberries for a girl? Or a "Blue Lagoon" mocktail with blue curacao syrup, pineapple juice, and a splash of lime for a boy? The key is to make it visually appealing and delicious.
Don't forget the garnishes! Fresh fruit slices, colorful straws, and cute drink umbrellas can elevate your drink station from simple to stunning. Consider setting up a DIY drink bar where guests can customize their own drinks with different syrups, fruits, and toppings. This is a great way to get everyone involved and create a fun and interactive experience. And remember, presentation is key! Use clear glass dispensers or pitchers to showcase the vibrant colors of your drinks.
Sweet Treats That Reveal: Cakes, Cupcakes, and More
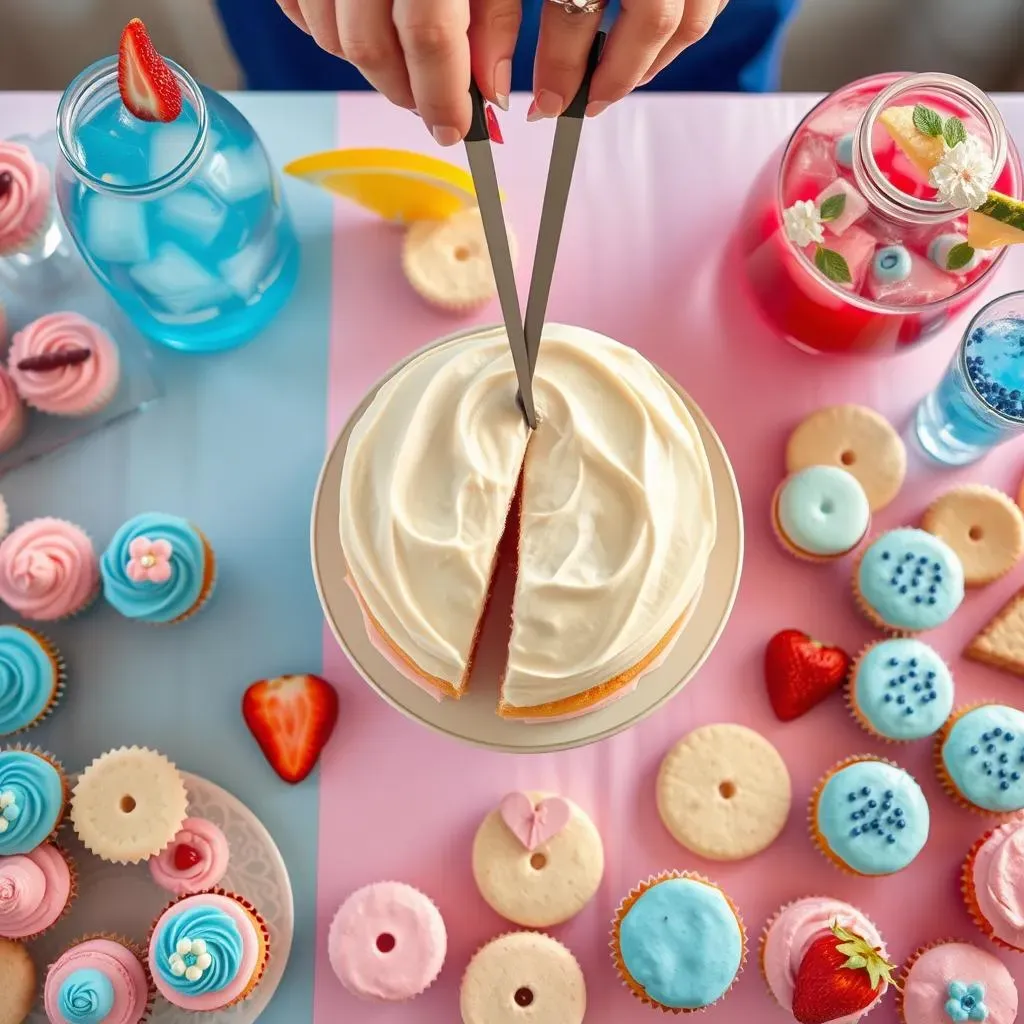
Cakes and cupcakes are a classic gender reveal treat for a reason! They're delicious, visually appealing, and offer endless possibilities for a surprise reveal. The most common method is to bake a cake with a pink or blue filling. When you cut into the cake, the colored filling reveals the baby's gender. You can also do this with cupcakes by filling them with pink or blue frosting. Another fun idea is to decorate the outside of the cake or cupcakes with neutral colors and then reveal the gender with a hidden message or design inside.
But don't limit yourself to just cakes and cupcakes! Consider other sweet treats like cookies, macarons, or even popsicles. You can use food coloring to create pink or blue versions of these treats or incorporate a hidden filling for a surprise reveal. For example, you could bake sugar cookies and decorate them with white frosting, then fill them with pink or blue sprinkles. Or, you could make macarons with a pink or blue ganache filling. Get creative and have fun with it!
Sweet Treat Idea | Reveal Method | Tips |
|---|---|---|
Cake | Colored filling | Use a vibrant food coloring, bake the cake evenly |
Cupcakes | Colored frosting | Use a piping bag for a professional look, add sprinkles |
Cookies | Colored sprinkles inside | Use a cookie cutter to create fun shapes, bake until golden brown |
Savory Surprises: Gender-Themed Snacks and Bites
Who says gender reveal food has to be all about sweets? Let's add some savory options to the mix! Consider creating a "pink" and "blue" snack bar with different savory snacks in each color. For example, you could have pink popcorn, strawberry cream cheese on crackers, and prosciutto-wrapped melon for the "pink" side, and blue corn tortilla chips, blue cheese dip, and blueberry-infused olives for the "blue" side. This is a fun and interactive way to get guests involved in the guessing game.
Another idea is to create mini quiches or tarts with a hidden pink or blue filling. You can use beet juice to naturally color the filling pink or blue spirulina powder to color it blue. Or, you could create mini sliders with pink or blue-colored cheese. Get creative with your savory options and don't be afraid to experiment with different flavors and colors. Remember, the goal is to surprise and delight your guests with delicious and unexpected treats.
Memorable DIY Gender Reveal Photo Booth and Keepsakes
Memorable DIY Gender Reveal Photo Booth and Keepsakes
Strike a Pose: DIY Photo Booth Fun
so you've got the decorations, the games, the food... now it's time to capture those memories! A DIY photo booth is a must-have for any gender reveal party. It's a fun way for guests to let loose, get silly, and create lasting keepsakes. And the best part? It doesn't have to cost a fortune! You can easily create a stunning photo booth backdrop using streamers, balloons, fabric, or even a DIY banner. Get creative with the props! Think about baby-themed items like pacifiers, rattles, bibs, and hats. You can also incorporate pink and blue props to keep the guessing game going.
Don't forget about the lighting! Good lighting is essential for taking great photos. If you're hosting your party indoors, consider using a ring light or setting up your photo booth near a window with natural light. If you're hosting your party outdoors, try to find a shady spot to avoid harsh sunlight. And most importantly, don't forget to have fun! Encourage your guests to get creative with their poses and props. The more silly and spontaneous, the better!
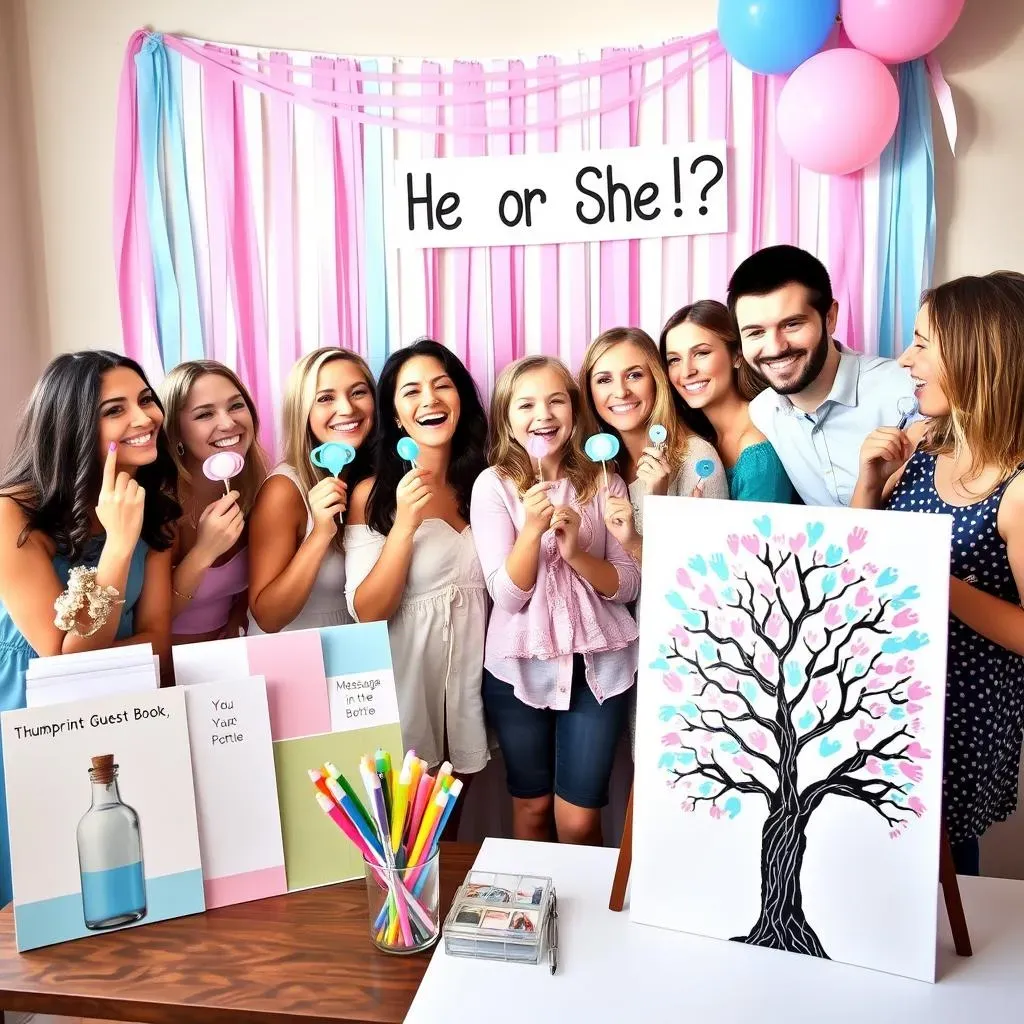
Keepsakes That Last: Beyond the Guest Book
Sure, a guest book is nice, but let's think outside the box when it comes to keepsakes! How about a "Message in a Bottle" station where guests can write their wishes and advice for the parents-to-be on small pieces of paper and place them in a decorative bottle? Or, create a "Thumbprint Guest Book" where guests can leave their thumbprints on a canvas to create a unique piece of art. You can even turn those thumbprints into balloons, animals, or other baby-themed designs.
Another fun idea is to create a "Time Capsule" for the baby. Guests can bring small items that represent the current year or write letters to the baby to be opened on their 18th birthday. This is a great way to capture a snapshot of this moment in time and create a truly special keepsake. And don't forget about personalized thank-you notes! Take the time to write a heartfelt thank-you note to each guest for celebrating with you. It's a small gesture that will go a long way.
Keepsake Idea | Materials | Tips |
|---|---|---|
Message in a Bottle | Decorative bottle, paper, pens, ribbons | Provide a variety of paper colors, add embellishments |
Thumbprint Guest Book | Canvas, ink pads, pens, wipes | Choose non-toxic ink pads, provide wipes for cleaning fingers |
Time Capsule | Decorative box, items representing the current year, letters | Set a date for opening the time capsule, include instructions |
DIY Photo Favors: Prints, Magnets, and More
Want to take your photo booth to the next level? Consider offering DIY photo favors! This is a fun way for guests to take home a tangible reminder of your gender reveal party. You can set up a mini photo printer and let guests print out their favorite photos from the photo booth. Or, you can create DIY photo magnets using adhesive magnet sheets and printed photos. Another idea is to create personalized photo keychains or ornaments.
If you're feeling extra crafty, you can even create DIY photo albums or scrapbooks. Provide guests with blank pages, stickers, and markers and let them create their own personalized keepsakes. This is a great way to get everyone involved and create a truly unique and memorable favor. And don't forget to provide packaging! Cute bags, boxes, or ribbons can add a special touch to your photo favors.
Conclusion: Celebrating with Creativity and Heart
So, there you have it – a treasure trove of gender reveal party ideas DIY style! Remember, the most important ingredient for a memorable celebration isn't a hefty budget, but rather a dash of creativity, a sprinkle of personalization, and a whole lot of love. Whether you opt for a balloon-popping extravaganza, a confetti-filled surprise, or a delectable dessert reveal, the key is to make it your own. Embrace the fun of crafting, involve your loved ones in the preparations, and most importantly, cherish the joy of sharing this special moment with the people who matter most. Here's to a gender reveal party that's as unique and wonderful as the little one you're eagerly awaiting!